
If we think about decorating our spaces with our own creativity, few will dare! Here we present you 9 crafts with skewer sticks to decorate your spaces. You’ll see how easy and economical it is.
Imagine that you have taken courage and want to get started in this craft, you call some friends to communicate the idea. They all get together and share a coffee with cookies
After the coffee, they start making plans about the decorations they can start making, no doubt, you will ask yourself can I do it? And the answer is yes, because if you apply the steps that we will show you in each design, you will be able to acquire experience
9 crafts with skewers
Next, we will show you some models and the steps to make them quickly and easily:
1. Sun Mirror
This beautiful decorative detail can be placed in the bedroom or in the living room, it is quick and easy to do. The necessary materials are: Cold silicone, white glue, gold spray, small, medium and large gold sequins. Also, a mirror of any size you like and sticks.
- Take the skewer sticks and paint them with the golden spray, let them dry for 20 minutes.
- Place the mirror on a piece of cardboard and mark it with a pencil to make a mould. Then, with a glass trace in the center of the cardboard a smaller circle.
- Start sticking the sticks around the small circle with some separation. When you finish, that first round of sticks, you place other sticks almost at the tip of the cardboard.
- Once you place the sticks around the reference circle you will see that some of them stick out giving the appearance of the sun.
- Then gradually apply the white glue to the sticks and cardboard until it is well covered. Then let it dry for an hour and put cold silicone on top of the sticks, but only around the cardboard to stick the mirror.
- You attach the mirror and leave it overnight with a certain weight of pressure so that it sticks well.
- With cold silicone put the big sequin on the protruding sticks and the medium one on the small sticks. Measure 12cm on the large stick and place another sequin. Similarly, on the small stick, measure 15cm and place another medium sequin.
- Repeat until you have stuck two large sequins on the sticks that stick out and two medium ones on the others.
2. Kitchen towel holder
This is a useful design for your kitchen, in which you can place your paper towel. The materials to use are: 3 liters plastic bottle, cold silicone or any glue and skewer sticks.
- Take a bottle, cut out the bottom base and draw an oval-shaped mark on the ends. You can do it with a measure of 26cm at the top and 4cm at the bottom and proceed to cut.
- Sand the surface of the bottle until it is rough on the outside so that it will hold the glue.
- Use the stick to measure the height of the base, cut it out and stick it on. Repeat this until you cover the entire base.
- Take 2 CDs, apply glue and stick them together. Cut out two pieces of cardboard the size of the CDs and glue them together too. On the other hand, cut out a light tube with a height of 20cm.
- Take the cardboard circle that we made in the previous step and with the CDs mark a central circle. Now, with a knife make an opening in the center and join the cardboard with the CDs. Then, cover this base with a cloth, it can be made of jute that matches with the sticks.
- On the inside, cut the fabric that covers the central hole of the base. Fix the tube in that hole with hot silicone. This support is where the kitchen roll will be placed.
- Now, apply enough hot silicone around the bottom base to stick it to the base of the sticks.
- You can use jute string to decorate the edges of this design. We suggest, making a braid to cover the edge of the cut sticks. Also, at the bottom to cover the edge of the cardboard with cd put jute string.
- The paper holder is ready, the rest you can decorate as you prefer with decorative ribbon or other applique.
3. Candleholder with sticks
Here you can get creative, the model we will describe is super easy, you only need a can, glue and sticks. The steps are:
- Take the can of the size you prefer, apply glue where you will place the sticks. When you apply the glue, you will be able to see the shape of the stick. The can should be in the middle and the sticks should be symmetrical for stability.
- If the sticks are straight, apply the glue in a straight line. If you want to apply it at an angle, apply the glue by drawing an inclined line to adhere the stick.
- This way you cover the can around it leaving some minimal separation. Then spray paint your design in the color of your choice.
4. Desktop decorations in three sizes
This is a nice detail to put on a little table. You need: balls, skewers, spray paint, 3 small boxes, hot glue and scissors. Here are the steps to follow:
- To make the first decoration, take the sticks and cut it into three equal parts. Cut the second one in three parts, but smaller and you will have a piece left over. For the last one, cut the sticks in four parts.
- Then, take the port-wire ball and cover it with the first sticks you cut symmetrically. You open the holes, apply silicone with the gun and place the stick. To hold the ball we put a thicker stick.
- Take one of the boxes and remove the lid and open a small hole in the middle. There, introduce the thick stick that contains the decoration.
- To paint it, put on a mask, use newspaper or plastic and apply the color. Do this evenly and let it dry for half an hour.
- Repeat the steps with the other two boxes.
5. Heart Sticks

This idea is easy and quick. To execute it, you need cardboard, hot glue, skewer sticks and follow these steps:
- Draw several hearts on a cardboard, cut them with the scissors, they can be of different sizes.
- Draw the mold obtained in a striking fabric, and cut it out so that you can cover the heart. When you have all the hearts lined, stick each one on a skewer.
- You can stick them in a space on the wall or place them in a glass because they are very decorative.
6. Birthday decorations
These sticks are very useful at children’s and adults’ birthday parties. For children, they are used to hold candy.
- Take a ball of portland cement, cut it in half, and paint it in a color that matches the decoration.
- Place several gummies in a linear fashion one after the other on the stick, interspersing colors. Cover it with transparent paper to protect it.
- On the flat end of the skewer stick you can place any ornament of your creation.
- The pointed end you insert into the painted polyester ball and add as many decorated sticks as you like. This you place on the candy table and it will look great.
7. Centerpiece with candy
In this model, the jelly beans go around a small polystyrene ball, unlike the previous one. Here we describe the steps:
- Use a small or medium sized port-wine ball and insert rubber bands on the sticks.
- Insert the sticks with the jelly beans over the ball, start from the top and work your way through the colors.
- Place a thick skewer on the bottom of the ball.
- You can use a plasticine inside a skewer as the main base and insert the skewer stick there. Decorate the long stick with a colorful ribbon that harmonizes with the atmosphere of the celebration. In the empty space of the skewer, place candy and a card.
8. Children’s Christmas Centerpiece
To end the year we can also use these handy sticks. You need: acrylic boxes, paint, brushes, wool, skewer sticks, polystyrene balls, felt and glue.
- Form pompoms for the snowman’s body and place two pompoms on each one.
- Then, glue the pompoms to the skewer sticks.
- Place a ball of polystyrene on top of each skewer, along with the two pompoms.
- With orange felt, make two little cones that will be the noses of these dolls. With other colours’ felt, make two hats, which you can make with two cylinders and two circles. If you want them to be firmer, you can use cardboard inside the felt.
- Take the strips of wool and use them to create small scarves for the dolls. You can also use these strips to wrap the acrylic box to make it more colourful. The box can be decorated as you wish.
- Finally, use the marker to draw the eyes of both dolls on their faces
9. Heart basket
This craft will be quite useful for storage and you can also use it with candy for a gift. These are the materials: cardboard, two-colored tape, hot glue and skewer sticks. Follow these steps:
- Make a heart-shaped base of your choice from sturdy cardboard. Similarly, on a piece of fabric of your choice, draw the same heart and cut out two pieces to stick to the cardboard.
- Once you have glued the fabric on both sides of the heart, cut out what is left over.
- Take the skewer sticks and cut them out, according to the height you want your basket to be
- Start gluing the silicone sticks over the lined heart to form the walls of the basket. Then, he passes the tape between the sticks simulating a tissue. Interchange the colors of the tape at each level until you reach the height of the sticks.
- When you finish weaving the tapes, place a pearl-colored stone on each end of the sticks. This will prevent the end of the stick from being seen
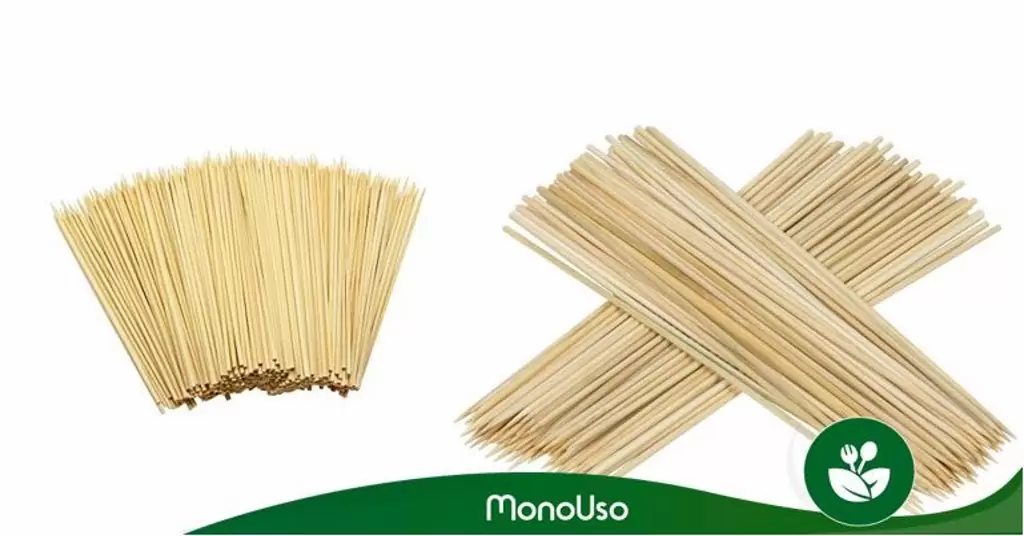
As you can see, there are a variety of crafts you can make with these magic sticks. The best option is to buy them and have them at home, so look for them where they give you quality and a good price.
At Monouso we offer you resistant skewer sticks in different sizes and thickness. This way, you can have this material so necessary for your crafts and celebrations.
We invite you to know our offers in skewer sticks, no doubt, you will buy them for their multiple use and low price. We are waiting for you